Ubuntu / Linux news and application reviews.

Web Based FTP Client

Web Based FTP ClientNet2FTP is a web-based FTP client which has all the features one could ask in a full stand-alone application. You can either use it directly at http://www.net2ftp.com or install it on your own web server.

With Net2FTP, you can:

* Install software on your server (requires PHP).
* Copy, move or delete files and directories.
* Edit text and HTML files online.
* Filter files using filename, size and modification time.
* Upload/download files in a zip format, and unzip files on the server.
* Copy files from one FTP server to another FTP server.
* Rename, Chmod and tons of administrative features.

Net2FTP even supports skins!

You can use Net2FTP on a computer that doesn't have any FTP client installed or on your own machine, just for the fact that a FTP client can't get lighter than this (it's just a webpage afterall...).

[via techie-buzz.com]

Adobe Released A New Alpha Version Of Flash Player 10 for Linux x86_64 (64 bit)

Yesterday, Adobe released an alpha version of Flash Player plug-in version 10 for x86_64 architecture. This is a prerelease version of the Adobe® Flash® Player 10 software 64-bit Linux platforms. It is being made available for developers and consumers to test their content to ensure new features function as expected, existing content plays back correctly, and there are no compatibility issues.

The Flash Player 10 prerelease is available in all supported languages; however, the prerelease installers are only in English and we can only accept feedback in English at this time.

Important: All users should uninstall any currently installed Flash Player before installing the latest prerelease.

Download it from here

Get the Feel of Dreamweaver in a Firefox Extension

codetech firefox extension

Codetech is a Firefox addon that lets you edit your documents right next to your web pages as you surf. For a web developer or designer, which offten deals with HTML source code, Codetch is a lite version of a application like Adobe Dreamweaver. It has a similar layout, yet less features, but it helps the user to complete its source based tasks.
Author description says it all. It’s the closest you can get to a professional web editing interface in a browser.

Integrate Google Calendar Into Your Gnome Calendar [Linux]

To integrate Google Calendar events into your Gnome desktop, go to Google Calendar, click on "Settings", then on the "Calendars" tab and then on your calendar's name:

google calendar

Then, at the bottom there is a section called "Private Address:" > click on the "ICAL" green icon to get your private calendar URL, like in the picture below:

google calendar private links

Now all you have to do is open a terminal and paste this:
/usr/lib/evolution-webcal/evolution-webcal URL
replacing URL with your ICAL private URL you got in the step above.

A window will pop up and here is where you can make the update frequency settings (I set mine to update every 30 minutes).

This is how your Google Calendar tasks, appointments, etc will show up in Gnome Calendar:

gnome google calendar


Please note: evolution-webcal may be in different folders in different distros. (For example in SuSe, it’s in /opt/gnome/lib/evolution-webcal/evolution-webcal). If the above code doesn’t work for you, you can locate evolution-webcal using:
find / -name evolution-webcal


[via paraisolinux]

Latest Google Chrome Dev Build Officially Adds Theme Support

Themes have been gradually getting simpler to activate in Google Chrome, but they became enabled by default in the newest developer releases this week, version 3.0.195.3 and a hasty bug-fix release Wednesday night, version 3.0.195.4. No longer must you mess with pesky "--enable-extensions" command-line switches or other nitty-gritty options.

google chrome theme

When you point Chrome to a theme's URL, the browser will offer to save it, a process that installs it, too.

chrome theme

If you're using the new Chrome developer release, there are two sample themes available, Camo and Snowflake. To activate them, click the link then agree to save the CRX file. Chrome will then switch themes and give you a yellow alert it did so.

Google is working on making this easier. In the tools menu, clicking "Options" and then "Personal Stuff," there's a "Themes" section with a "Get Themes" button. So far the Web site it links to is empty, but presumably it will be populated with some themes soon enough.

The themes also work on Mac OS X, though the options dialog box has a tantalizing color picker that I couldn't get to do anything.

The new version also adds support for the HTML 5 video tag, Google said. That feature is a centerpiece of browser makers' efforts to propagate "open Web" standards that permit richer Web sites and Web applications that don't rely on plug-ins such as Adobe Flash.

(Credit: Screenshot by Stephen Shankland/CNET)

Automatic Post Summaries for Blogger, With Image Thumbnails

We talked about a way of implementing selective excerpt ("Read More") for Blogger blogs (or expandable post summaries) and today I am going to present you another way of doing it, but this time by using image thumbnails (which can be turned off if you like).

This Blogger hack has 3 advantages:

1. You can set it to automatically cut off a post after a certain number or words or manually do this.
2. You can chose if you want to display a thumbnail image or not.
3. It is the first blogspot.com hack which allows you to use the <!-- more --> tag just like Wordpress.

Let's proceed to implementing the code. There are only a few simple steps you need to follow:

1. Log in to your Blogger Dashboard and go to Layout > Edit HTML and check the "Expand Widget Templates" box.

2. Search for the following piece of code in your template: <data:post.body/> and replace it with:
<b:if cond='data:blog.pageType != "item"'>
<div expr:id='"summary" + data:post.id' style='display:none;'><data:post.body/></div>
<script type='text/javascript'>createSummaryAndThumb("summary&lt;data:post.id/&gt;");</script>
<div style="clear:both" align='right' class='rmlink'><a expr:href='data:post.url'>-->Read More</a></div>
</b:if>
<b:if cond='data:blog.pageType == "item"'><data:post.body/></b:if>
If Blogger displays an error when saving the template, this code instead of the above.

In this code, edit the "Read More" text with something else if you want to.

3. Search for the <body> tag in your Blogger template and paste the following code above it:
<script type='text/javascript'>
var thumbnail_mode = 'no-float' ; 
var classicMode = false ;
var summary_noimg = 60;
var summary_img = 50;
var img_thumb_height = 150;
var img_thumb_width = 220;
var indent = 3;
</script>

<script type="text/javascript">
//&lt;![CDATA[
/******************************************
Auto-readmore link script, version 4.0 (for blogspot)

(C)2009 by Anhvo

Homepage:  http://vietwebguide.com

Please dont remove this copyright or change it into your own
******************************************************/

/*******************************************
CONFIG (extenal code)
-------------------------------

var thumbnail_mode = "float" ; //(or "no-float")
var classicMode = false ;
var summary_noimg = 60;
var summary_img = 50;
var img_thumb_height = 100;
var img_thumb_width = 120;
var indent = 3;

*********************************************/

function stripHtmlTags(s,max){return s.replace(/&lt;.*?&gt;/ig, '').split(/\s+/).slice(0,max-1).join(' ')}

function getSummaryLikeWP(id) {
return document.getElementById(id).innerHTML.split(/&lt;!--\s*more\s*--&gt;/)[0];
}

function getSummaryImproved(post,max){
var re = /&lt;.*?&gt;/gi
var re2 = /&lt;br.*?&gt;/gi
var re3 = /(&lt;\/{1}p&gt;)|(&lt;\/{1}div&gt;)/gi
var re4 = /(&lt;style.*?\/{1}style&gt;)|(&lt;script.*?\/{1}script&gt;)|(&lt;table.*?\/{1}table&gt;)|(&lt;form.*?\/{1}form&gt;)|()|()/gi

post = post.replace(re4,'')
post = post.replace(re3,'&lt;br /&gt; ').split(re2)

for(var i=0; i&lt;post.length; i++){
post[i] = post[i].replace(re,'');
}
var post2 = new Array();
for(var i in post) {
//if(post[i]!='' &amp;&amp; post[i]!=' ' &amp;&amp; post[i] != '\n') post2.push(post[i]);
if(/[a-zA-Z0-9]/.test(post[i])) post2.push(post[i]) ;

}


var s = "";
var indentBlank = "";
for(var i=0;i&lt;indent;i++){
indentBlank += " ";
}
if(post2.join('&lt;br/&gt;').split(' ').length &lt; max-1 ){
s = post2.join(indentBlank +' &lt;br/&gt;');
} else {
var i = 0;
while(s.split(' ').length &lt; max){
s += indentBlank + ' ' + post2[i]+'&lt;br/&gt;';
i++;
}
}
return s;
}


function createSummaryAndThumb(pID){
var div = document.getElementById(pID);
var content = div.innerHTML;
if (/&lt;!--\s*more\s*--&gt;/.test(content)) {
div.innerHTML = getSummaryLikeWP(pID);
div.style.display = "block";
}
else {

var imgtag = "";
var img = div.getElementsByTagName("img");
var summ = summary_noimg;
if(img.length&gt;=1) {
if(thumbnail_mode == "float") {
imgtag = '&lt;span style="float:left; padding:0px 10px 5px 0px;"&gt;&lt;img src="'+img[0].src+'" width="'+img_thumb_width+'px" height="'+img_thumb_height+'px"/&gt;&lt;/span&gt;';
summ = summary_img;
} else {
imgtag = '&lt;div style="padding:5px" align="center"&gt;&lt;img style="max-width:'+img_thumb_width+'px; max-height:'+img_thumb_height+'px;" src="'+img[0].src+'" /&gt;&lt;/div&gt;';
summ = summary_img;
}
}

var summary = (classicMode) ? imgtag + '&lt;div&gt;' + stripHtmlTags(content,summ) + '&lt;/div&gt;' : imgtag + '&lt;div&gt;' + getSummaryImproved(content,summ) + '&lt;/div&gt;';

div.innerHTML = summary;
div.style.display = "block";
}
}
//]]&gt;
</script>

Again, if you receive an error when saving your changes, use the code from here instead of the one above.

4. Configuring the code above:


In the script above you see some variables (bolded):
var thumbnail_mode= 'no-float';
var classicMode = false;
var summary_noimg = 60;
var summary_img = 50;
var img_thumb_height = 150;
var img_thumb_width = 220;

The thumbnail_mode variable determines whatever or not you want the image to be displayed to the left or the text. If you choose 'no-float', the image will not be displayed and if you choose 'float', the image thumbnail will be displayed on the left side of your posts when on the homepage (not post page).

classicMode sets if the posts should be cut off at the same point or not. It is advisable to change it to 'true' if you selected the 'float' mode for "thumbnail_mode"

summary_noimg and summary_img values are the number of words of the excerpts when your posts have or don't have an image attached. For instance, a value of '50' means "50 words".

img_thumb_height and img_thumb_width - the height and width the image thumbnails should have.

The really new thing with this script is that it works just like Wordpress does which means that you can use the <-- more --> tag to manually enter the post cut off point. Example:

The excerpt. This part of the post will be displayed on the home page. <!-- more --> The rest of the post. This part of the post will only be displayed once the user click on the "Read More" link or the post title.

Altough this script is better than the one I mentioned before (using selective posts cut off), it still has one disadvantage: setting it to automatically cut off posts, all of your posts will have an "Read More" link, even if they are shorter than the number of words you set it to cut the posts in your blog.

Don't forget to visit our list of Blogger (blogspot.com) hacks and gadgets.

[Credits: ChicaBlogger]

InfraRecorder: Free, Open-Source CD / DVD Burning Application [Windows Only]

InfraRecorderIf you are tired of applications such as Nero Burning ROM which come bundled with lots of other applications which you really don't need, have a huge size and are not free, you should give InfraRecorder a try.

InfraRecorder is lightweight (just 3.19 MB) CD / DVD burner software for Windows which does everything it's supposed to, for free.

InfraRecorder features

* Create custom data, audio and mixed-mode projects and record them to physical discs as well as disc images.
* Supports recording to dual-layer DVDs.
* Blank (erase) rewritable discs using four different methods.
* Record disc images (ISO and BIN/CUE).
* Fixate discs (write lead-out information to prevent further data from being added to the disc).
* Scan the SCSI/IDE bus for devices and collect information about their capabilities.
* Create disc copies, on the fly and using a temporary disc image.
* Import session data from multi-session discs and add more sessions to them.
* Display disc information.
* Save audio and data tracks to files (.wav, .wma, .ogg, .mp3 and .iso).

For newbies, it also comes with a step-by-step guide on how to burn CDs and DVDs, burn an ISO, create an image, copy an audio CD or reformat a disk. You can find this guide, HERE.

Download InfraRecorder

Thanks Tinhed for the tip!


Update: well this is weird, Nero just released a stripped down version (comes with just basic CD / DVD burning features, for everything else, you'll need to upgrade) of it's Burning ROM which is freeware. You can download if from HERE.

T-Messenger: Instant Messaging Using Twitter

t-messenger

T-Messenger is a Twitter client which runs on Adobe Air (works on: Windows, Linux and MacOSX) that not only looks like a instant messaging client but it also has some IM features: it allows you to create groups of users, send a picture using drag-n-drop, automatic url shortening via bit.ly and also if you exceed the 140-character limit it will make multiple tweets allowing you to post whatever you want without having to worry about making your message smaller.

T-Messenger is light-speed fast, ultra-responsive and has a very low memory footprint.

Update: T-Messenger only works in Linux if you install the latest version of Adobe Air!


[via bitelia]

Mozilla Weave Sync 0.5 Released

Weave Sync lets you securely take your Firefox experience with you to all your Firefox browsers — including our mobile browser, codenamed Fennec. It currently supports continuous synchronization of your bookmarks, browsing history, saved passwords and tabs.

Improvements in Weave 0.5:

* Major performance improvements during upload and download
* Sync waits until you’re not actively using the browser - no more occasional performance hiccups
* Improved support for bookmark tags and smart folders
* Support for changing passwords and passphrases
* Support for Fennec on Windows Mobile and Firefox on x86 OpenSolaris
* Better error handling and reporting

Install Weave 0.5 (for Firefox 3.5+)

5 Beautiful, Recently Updated Ubuntu Themes

1. New Wave

new wave gnome theme

Besides the GTK theme, New Wave also comes with:
- GUI New Wave Configurator,
- Emerald themes,
- Compiz-fusion settings,
- Second theme with dark menus,
- Firefox skin,
- Some metacity tweaks.
- Opera theme

Download New Wave | More info

2. Raysys QDark

Raysys QDark

Comes with GTK, Metacity and Emerald themes.

Download Raysys QDark

3. Black Rain

black rain ubuntu theme

Download Black Rain

4. BlackFuzz-Ubuntu Edition

BlackFuzz-Ubuntu Edition

It comes with GTK, Metacity and Emerald Themes + optional: icons.

Download BlackFuzz-Ubuntu Edition

5. Minimum Suite v 0.3


The archive contains :

- Minimum Black GTK Theme
- Minimum White GTK Theme
- Minimum Black Contrasted GTK Theme
- Minimum White Contrasted GTK Theme

- XFCE Black Windeco
- XFCE White Windeco
- XFCE Black Contrasted Windeco
- XFCE White Contrasted Windeco

- Metacity Black Windeco
- Metacity White Windeco
- Metacity Black Contrasted Windeco
- Metacity White Contrasted Windeco

- Gradient wallpapers

Download Minimum Suite v 0.3

And a bonus

Ultimate Theme Pack:

Ultimate Theme Pack Ubuntu
(the screenshot consists of just one out of the many themes that come with Ultimate Theme Pack)

O/S's Supported: Hardy+ x86 & x64 UE 1.8+ (Debian untested)
Version: 0.0.4
Architecture supported: x64 / x86
File size: 399.7 MB (419,097,724 bytes)

Comes with:
[*] 3 Ultimate Edition usplashes (18 - 32 bit autodetects architecture)
[*] 34 Wallpapers
[*] 14 GDM logins
[*] 27 Icon sets
[*] 102 GTK / Metacity themes
[*] 49 Emerald themes
[*] 5 Cursor sets
[*] 2 Sound schemes

The pack comes in a Ubuntu .deb package.

Download Ultimate Theme Pack

Download Gimp Animation Package 2.6.0 (GAP) .deb File for Ubuntu

gimp antimation packageRemember Gimp Animation Package? GIMP Animation Package is a collection of Plug-Ins to extend the GIMP with capabilities to edit and create Animations as sequences of single frames. GAP version 2.6.0 was released a while back and at the time, you needed to compile the package to be able to use it but now there are Ubuntu .deb packages available which you can use for a one-click install of Gimp Animation Package:

Download GAP for Ubuntu Jaunty 32 bits
Download GAP for Ubuntu Jaunty 64 bits

Preview All The Fonts Installed On Your Computer Without Installing Any Software [Free]

myfontbookHaving a big variety of fonts installed on your system is both a blessing and a curse: at some point you lost count on how many fonts you have installed and most importantly: which fonts. The best solution is having an application which displays a preview of your installed fonts so you'll know which one to use and when. For this you can use myFontbook which is a web application (so you don't have to install anything on your computer) that shows you a preview of all your fonts in an organized panel.

It find all your fonts in seconds and displays them in a small preview while at the bottom you can see the entire character set, chose a custom text to see how it would look like, special characters and some more options. Another thing for which myFontbook is great is that it helps you organize and catalog your fonts. One thing that really interests me is if it works or not on Linux but unfortunately I am currently at a computer which only has Windows installed but I'll update this post tonight when I'll be able to test myFontbook on my Linux machine.

Update: Yes, myFontbook works on Linux too, thanks Ariel!


myFontbook is a free and requires no registration, but if you want to save your preferences, you will have to register for an account.

[via Punto Geek]

Desktop Google Reader Application for Windows

Desktop Google Reader

Google Reader is probably the most popular RSS agregator service but it lacks an official desktop client but for that you can use Desktop Google Reader (unofficial client) who's major feature is Outlook-like notifications for new items arriving for any of your feeds. For now, it's features are very basic (like viewing/deleting & starring functionality) but it will hopefully grow into something more functional.

Download Desktop Google Reader | via BlogsDNA

A New Debian Version Every Two Years

debianWhere most time-based distributions have a schedule of round and about six months, Debian takes another approach, obviously because Debian is more about stability and longevity than about the latest and greatest features in each release. As such, the project adopted a two-year release schedule, with a development freeze every December of odd-numbered years, with the actual release following in the first half of the following year.

Time-based freezes will allow the Debian Project to blend the predictability of time based releases with its well established policy of feature based releases. The new freeze policy will provide better predictability of releases for users of the Debian distribution, and also allow Debian developers to do better long-term planning. A two-year release cycle will give more time for disruptive changes, reducing inconveniences caused for users. Having predictable freezes should also reduce overall freeze time.


The first of this new type of freeze will happen December 2009, making the time between the current release and the next one rather short - this is a one-time occurrence. "To accommodate the needs of larger organisations and other users with a long upgrade process, the announcement reads, "the Debian project commits to provide the possibility to skip the upcoming release and do a skip-upgrade straight from Debian GNU/Linux 5.0 (Lenny) to Debian GNU/Linux 7.0 (not yet codenamed)."

[via osnews]

Freeware System Information Software for Windows: SIW

siw

SIW (System Information for Windows) is a tool that displays details regarding everything on your computer: hardware, operating system, etc... Kind of like Lavalys Everest if you like, but freeware. By the way, if you want a free license for Everest 4.6, read here. We already talked about 2 such system info applications but for Linux while SIW runs on Windows (see all supported Windows versions at the bottom of the post).

The system information is divided into few major categories:
  • Software Inventory: Operating System, Installed Software and Hotfixes, Processes, Services, Users, Open Files, System Uptime, Installed Codecs, Software Licenses (Product Keys / Serial Numbers / CD Key), Secrets (Password Recovery).
  • Hardware Inventory: Motherboard, Sensors, BIOS, CPU, chipset, PCI/AGP, USB and ISA/PnP Devices, Memory, Video Card, Monitor, Disk Drives, CD/DVD Devices, SCSI Devices, S.M.A.R.T., Ports, Printers.
  • Network Information: Network Cards, Network Shares, currently active Network Connections, Open Ports.
  • Network Tools: MAC Address Changer, Neighborhood Scan, Ping, Trace, Statistics
  • Miscellaneous Tools: Eureka! (Reveal lost passwords hidden behind asterisks), Monitor Test, Shutdown / Restart.
  • Real-time monitors: CPU, Memory, Page File usage and Network Traffic.

SIW is portable and freeware and runs on: Microsoft Windows 98 / Me / NT4 / 2000 / XP / Server 2003 / Media Center / Tablet PC / Windows 2003 Server R2 / Vista / Windows Server 2008 / Windows 7 / Windows Server 2008 R2 / WinRE / Bart PE / Winternals ERD Commander

Download SIW | via PPLWare

Download Avidemux 2.5.0: (For: Ubuntu - .deb Files, Windows)

Avidemux is a free video editor designed for simple cutting, filtering and encoding tasks. 
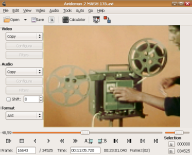
It supports many file types, including AVI, DVD compatible MPEG files, MP4 and ASF, using a variety of codecs. Tasks can be automated using projects, job queue and powerful scripting capabilities.Avidemux is available for Linux, BSD, Mac OS X and Microsoft Windows.

What's new in Avidemux 2.5.0:
* Audio Codecs, Audio Devices and Video Filters are now plugins
* x264 and Xvid encoders are now also plugins with an updated Qt interface
* Auto wizards are now scripted and easier to extend
* Updated the FFmpeg libraries
* Various minor fixes and enhancements

You can find the complete changelog, here (current build: r5152).

Download Avidemux 2.5.0:


Windows
Other Windows Downloads:

Most versions and svn builds Hosted by Gruntster

Most versions and svn builds Hosted by Lord Mulder


Ubuntu Linux:
Debian - read the instructions here.

For other operating systems / Linux distributions, see here.

How To Upgrade From Windows 7 Beta or RC to Windows 7 RTM

If you have installed Windows 7 Release Candidate or Windows 7 Beta (or any other pre-releases for that matter) then you cannot directly upgrade to Windows 7 RTM (current build: 7600.16385). Well actually you can, but after applying a trick. When trying to upgrade to Windows 7 build 7600.16385, the setup will give you an error message saying: You cannot upgrade this prerelease version of Windows 7. Go online to see how to install Windows 7 and keep your files and settings:

You cannot upgrade this prerelease version of Windows 7. Go online to see how to install Windows 7 and keep your files and settings

That's because Windows 7 RTM was build to block all versions prior to 7233. But you can bypass this by following the simple steps below:

1. Extract the contents of Windows 7 RTM ISO Image to any folder or USB Disk using WinRAR.
2. Open the sources folder, and then using notepad, open "cversion.ini" file.
3. Modify the "MinClient" build number to a value lower than the down-level build. For example, change 7233 to 7000.
Original content of cversion.ini:
[HostBuild]
MinClient=7233.0
MinServer=7100.0
How the file should look like after you have modified it:
[HostBuild]
MinClient=7000.0
MinServer=7100.0
4. Save the updated file to the same location and then run setup.exe to start Windows 7 RC upgrade process.
5. On the Installation type screen, choose whether you want to upgrade your current Windows 7 Beta or RC:

upgrade windows 7

Speed Up Flash and Firefox in Ubuntu Jaunty [Tips & Tricks]

1.

Type the following command in a terminal:
sudo gedit /etc/init.d/ondemand
and paste this inside that file:
for CPU_THRESHOLD in /sys/devices/system/cpu/cpu*/cpufreq/ondemand/up_threshold
do
[ -f $CPU_THRESHOLD ] || continue
echo -n 40 > $CPU_THRESHOLD
done

The file basically needs to look like this:
case "$1" in
start)
start-stop-daemon --start --background --exec /etc/init.d/ondemand -- background
;;
background)
sleep 60 # probably enough time for desktop login

for CPUFREQ in /sys/devices/system/cpu/cpu*/cpufreq/scaling_governor
do
[ -f $CPUFREQ ] || continue
echo -n ondemand > $CPUFREQ
done

for CPU_THRESHOLD in /sys/devices/system/cpu/cpu*/cpufreq/ondemand/up_threshold
do
[ -f $CPU_THRESHOLD ] || continue
echo -n 40 > $CPU_THRESHOLD
done
;;
restart|reload|force-reload)
echo "Error: argument '$1' not supported" >&2
exit 3
;;
stop)
;;
*)
echo "Usage: $0 start|stop" >&2
exit 3
;;
esac

More info about this, HERE.

2.

Open a terminal and paste this:
sudo mkdir /etc/adobe
echo "OverrideGPUValidation=true" >~/mms.cfg
sudo mv ~/mms.cfg /etc/adobe/

More info, HERE.

Thanks phyx for these 2 tips & tricks.

The New Twitter Homepage Is Now Live

Twitter just announced its new home page redesign complete with trending topics and search.

Now:

picture-316

Before:

54257v1

Comparing the old homepage to the new homepage sheds an enormous amount of light on Twitter’s ambitions with its microblogging platform. Here’s the old description text:

“Twitter is a service for friends, family, and co-workers to communicate and stay connected through the exchange of quick, frequent answers to one simple question: What are you doing?

And here’s the new text:

“Share and discover what’s happening right now, anywhere in the world”

You immediately notice the deemphasis on your personal network – the people you live, sleep, and work with – and the focus on realtime discovery and world events. Twitter’s stepped away from being branded as a social network, or being compared to Facebook.

The second big change is search – specifically the trending topics. The company not only makes sure you realize that the Twitterverse is talking about things you care about (whether it’s pitcher Mark Buehrle or Blue M&Ms), but it explains them with a conversation bubble that appears when you hover over the question mark icon.

And here’s Twitter’s post on the new homepage. Here’s the key blurb:

The open and timely exchange of information will have a positive impact on the world and Twitter has a role to play. We have a lot of work to do when it comes to the quality of our search results and trend analysis but repositioning the product to focus more on discovery is an important first step in presenting Twitter to a wider audience of folks around the world who are eager to start engaging with new people, ideas, opinions, events, and sources of information.

We’ll likely continue to make changes to the Twitter home page as we respond to feedback and ideas. We’re eager to see if encouraging a sense of wonder and discovery leads to a better first impression of Twitter.

An interesting thing: It also looks like Twitter is using this new homepage search interface to highlight some of the lesser-used search operators, like the “:)” symbol for results with “positive attitude.”

picture-108

picture-1114

Free Partition Manager Which Supports 32 / 64 bit Windows 2000, XP, Vista and 7

Partition Wizard Home Edition

Partition Wizard Home Edition is a free partition manager which supports 32/64 bit Windows Operating System including Windows 2000, XP, Vista and Windows 7. Home users can perform complicated partition operations by using this powerful but free partition manager to manage their hard disk partition such as Resizing partitions, Copying partitions, Create partition, Delete partition, Format partition, Convert partition, Explore partition, Hide partition, Change drive letter, Set active partition and Partition Recovery.

Main Features
  • Support Windows 2000/XP/Vista/Windows7 (32 bit & 64 bit) operating system.
  • Support RAID.
  • Extend system partition to improve computer performance to maximum.
  • Manage the hard disk to get the best performance of computer.
  • Create , Delete and Format partitions with simple steps.
  • Disk Copy to protect or transfer data.
  • Support disk and partition size larger than 2 TB.
  • Convert partition format from FAT to NTFS.
  • Partition Copy: Copy the entire hard disk to another one.
  • Copy Disk Wizard: Copy the entire hard disk to another one without windows reinstalling.
  • Disk Map - Visually demonstrate your disk/partition configuration; preview the changes before applying.
  • Hide/unhide partition, set active partition, etc. - Change partition properties.
  • Explore FAT/NTFS partition.


Partition Wizard Home Edition is designated for home user only, to use Partition Wizard in a business envirnoment, Partition Wizard Business Edition is required.

Advanced Gmail Notifier for Linux - CheckGmail - Lets You Control Emails From The Notification Area

Remember Highly Ubuntu Integrated Gmail Notifier? What if you could click the notification bubble to delete, open or mark an email as spam? It doesn't use the Ubuntu Jaunty notification system, but close enough: CheckGmail is an application that stays in your notification area and whenever you receive a new email, it opens a small notification window and by clicking the window you are taken to your Gmail account and when hovering the mouse over the icon, you have options to delete the email, archive, mark as spam and so on:

check gmail


The application also lets you undo your last action for instance undeleting an email.

To install CheckGmail in Ubuntu, simply open a terminal and type:
sudo apt-get install checkgmail
Once the installation is over, you can launch it from Applications > Internet > CheckGmail and enter your Gmail credentials, checking interval and so on:

checkgmail ubuntu settings

Anonymous BitTorrent Using ItsHidden VPN [Windows & Linux]

With anti-piracy outfits warning those who share copyrighted content and ISPs threatening to pull the plug on alleged offenders, many file-sharers have decided to protect themselves by going anonymous. To accommodate this growing demand, ItsHidden is now offering a free VPN targeted at those who want to protect their privacy online.

Named ItsHidden, the free VPN solution has opened up a BETA test to the public, who can now privatize their Internet traffic - including BitTorrent transfers - in next to no time. ItsHidden was set up with torrent users in mind, allowing them to hide their identities from ‘third parties’ who choose to snoop on their activities.

“It has been created to put some rights back in the favor of the user and that includes us,”

David from ItsHidden explained.

“There are so many bodies, mostly unelected that seem to have full access to the most intimate of online details with little or no justification and more importantly, no evidence.”

ItsHidden Features:
  • Fast and reliable with over 4 Gigabits of Dedicated Bandwidth
  • Instant access
  • Total Privacy, no records of your surfing are kept by us
  • No Software is needed
  • 128 Bit Secure Connection to ensure privacy over all networks
  • It's FREE!!!!
We have of course tried ItsHidden ourselves and the service is offering good speeds for a VPN, although this might differ based on the user’s location and the load on the network. Right now, we are hoping that it wont collapse once thousands of new users flood the network.

Setting up ItsHidden is quite easy. All you have to do is follow these steps:
-for Windows XP
-for Windows Vista
-for Linux, read on!


How to set up ItsHidden VPN connection for Linux

1. Run the following command in a terminal:
sudo apt-get install network-manager-pptp
2. Click on the network manager icon in the task bar and select VPN Connections and then Configure VPN. In the VPN configuration window, click Add then click Next and the second page, under Connect To, select PPTP Tunnel and then click Next.
In the Connection Tab:

a. Under Connection Name enter ItsHidden
b. Under Gateway enter vpn.itshidden.com
c. Under username and password, enter the username and pass you enter when creating a ItsHidden account
3. On the Advanced options, check the option "Use Point-to-Point Encryption (MPPE)" and select 128 bit type encryption.
4. Apply the changes and go to the network manager in the notification area and right click it, click on "VPN Connections" and choose the newly created "ItsHidden" connection -> you should now be connected to the VPN. If you have successfully connected, a small 'lock' icon will be displayed next to the connection icon in your notification area like in the image below:

vpn

Download Videos from Various Flash-Based Video Hosting Sites, Without Having to Use Flash Player [Windows, Linux, Mac OSX]

get-flash-videos

get-flash-videos is a command-line utility to download flash video from most video sharing websites, which works on Linux, Windows and MacOSX. Yes, there are many applications or Firefox addons such as DownloadHelper which can do this. Well, sort of, because they all fail at some point: get-flash-videos program uses rtmpdump to get even the stuff that's locked up with Adobe's proprietary DRM known as RTMP; while most of these little video downloader addons, programs and sites will be able to grab your average youtube video, they're not going to be able to get anything from a site that's streaming using RTMP.

Includes support for the following sites/players (and more!):

* YouTube, eHow, Brightcove (used by many sites like Channel 4, Daily Telegraph ...), BBC (news, etc), Metacafe, 5min, Google, fliqz, nicovideo, vimeo, Blip, Break, Collegehumor, Muzu, Sevenload, Megavideo, Wat.tv.
* Also includes a 'generic' method which works on many other sites.

get-flash-videos Installation / Usage

Requirements

Basic requirements:

  • perl >= 5.8.0
  • WWW::Mechanize (but not for the combined version, see OSX below).

Optional requirements (for support for certain sites):

  • rtmpdump (see section below)
  • XML::Simple
  • Data::AMF
  • Compress::Zlib

1. Ubuntu

Run the following commands in a terminal (this installs it system-wide):
sudo apt-get install libwww-mechanize-perl libxml-simple-perl
wget http://get-flash-videos.googlecode.com/files/get-flash-videos_1.14-1_all.deb
sudo dpkg -i get-flash-videos_1.14-1_all.deb

Then, to download something:
get_flash_videos url..


2. Other Linux/Unix-like OS

Install the Perl modules WWW::Mechanize (required) and XML::Simple (required for some sites). Preferably install the packaged versions of these provided by your distribution. If you can't, install the modules off CPAN - see the perlmodinstall documentation for more information.

Then run the following commands in a terminal, this installs get-flash-videos system-wide:
sudo wget http://get-flash-videos.googlecode.com/files/get_flash_videos-1.14 -O /usr/local/bin/get_flash_videos
sudo chmod a+x /usr/local/bin/get_flash_videos

Then, to download something:
get_flash_videos url..


3. Windows

Install ActivePerl, making sure you tell the installer to add perl's bin directory to your PATH.

Install the Perl modules WWW::Mechanize (required) and XML::Simple (required for some sites). You can install these using ActivePerl's PPM tool.

Save get-flash-videos somewhere on your hard disk, for example c:\flash.

Then, to download something go to: Start -> Run, type:
cmd
And then to download a video, type in cmd:
perl c:/flash/get_flash_videos url


4. OSX

Run the following commands in a terminal, this installs it in your home directory:
curl -o get_flash_videos http://get-flash-videos.googlecode.com/files/combined-get_flash_videos-1.14
chmod a+x get_flash_videos
Then, to download something:
./get_flash_videos url..
Note: you may also need to install the Perl modules XML::Simple and Data::AMF for support for some sites.

rtmpdump

get_flash_videos can download videos from servers over RTMP, this needs rtmpdump. You can get a copy of rtmpdump from here. If you compile it or use an unpackaged version you should copy this to somewhere on your PATH (e.g. /usr/local/bin).

For help on using the scrip, see it's manpage.

Fix Mouse Scrolling in Firefox with SmoothWheel Extension

SmoothWheel Firefox addon

On Linux I used to hate the scrolling in Firefox. It was always lagging and very slow so I really needed something to fix this. Later the same behavior started ocurring on Windows too. Among the things I found to fix this Firefox scrolling issues is the SmoothWheel extension which can be used to configure the scroll speed extensively. Its developers say that you can use SmoothWheel to actually move any webpage and read while scrolling.

The addon configuration allows you to set the scrolling speed to a value as low as 10 pixels or up to 500 pixels, and when holding down the Alt or Shift key you can temporarely increase or decrease the speed. It might take a few tries before the ideal scroll speed settings can be found but it is very well worth it in the long run. Additional options are available in the basic settings window like enabling the same scrolling speed when using the computer keyboard to scroll. The advanced settings on the other hand can be configured to change adaptive duration and steps and a fps limit.

And the best thing about SmoothWheel had yet to come: since it's based on the Firefox API, it also supports Thunderbird, ChatZilla, Flock, Songbird and Seamonkey.


If SmoothWeel does not satisfy you, I suggest you give Yet Another Smooth Scrolling add-on a try (my personal favorite).

How To Recover Your Linux Root Password

Let's face it: you can sometimes forget a password, because well... it happens! I can't help you with all of them, but I can tell you how to recover your lost Linux root password thanks to Tips4Linux. Just follow the below steps to recover it:

1. Reboot your system and at the GRUB press "e". Edit the first line and make sure it says "linux single". Then press "b" to boot the new entry line.

2. You will now have access to a BASH prompt. Enter the following commands:
cd /etc
nano passwd
and look for a line somewhere at the top of the file that looks like this:
root:x:0:0:root:/root:/bin/bash
You must remove the "x" from that line so it will look like this:
root::0:0:root:/root:/bin/bash
And save the file.

3. Run the following command:
nano shadow
Edit the first line in the shadow file by removing the encrypted password. The line must now look exactly like this:
root::::
Now save the file.

4. Reboot the system and log in as a normal user, then set your new root password using the following commands:
su
passwd

CD / DVD Burning Application ImgBurn Updated to Version 2.5

ImgBurn

ImgBurn is a freeware CD, DVD, HD-DVD and Blu-Ray burning application and it was recently updated to version 2.5. The program stays the same at its core which means it is still the lightweight DVD burning software that can be installed or used as a (unofficial) portable version instead. You'll notice all kinds of added support for file types and error handling, slightly tweaked or improved features, and a handful of fixed bugs. We already love ImgBurn as is, and while this update isn't boasting any terribly sexy new features, it's great to see that the freeware favorite is still under active development.

Below are some of the more important changes introduced in this version of ImgBurn:

  • An ‘Advanced’ input mode to build mode where you have total control over the layout of the disc and can add new folders, change names etc. (i.e. you’re no longer limited to burning an existing folder structure on your hard disc as-is)
  • ImgBurn now adds itself to the context menu’s ‘Open With’ submenu for files it’s associated with.
  • Support for burning CCD files.
  • Support for building images using the ‘MODE2/FORM1/2352′ data type. (previously it only supported ‘MODE1/2048′)
  • A check to ensure all the DVD Video files in a sequence are present. (i.e. it’ll prompt if VTS_XX_1.VOB and VTS_XX_3.VOB are present but VTS_XX_2.VOB isn’t)
  • Detection of attempts to build Vista style OS installation discs (via the ’sources\install.wim’ file) and the relevant prompting for conflicting settings, failing to make it bootable etc (same as an ‘I386′ install disc).

ImgBurn can also run as a portable app, perfect for carrying on your USB flash drive for burning on the go. Portable Freeware offers the following easy steps to convert the installer:
Download the installer and extract (using 7zip or similar) to a folder of your choice. Remove $PLUGINSDIR and [NSIS].nsi. Create an empty file called ImgBurn.ini in the same folder. Launch using "ImgBurn.exe /portable".

ImgBurn is freeware, works on Windows and Linux (using Wine).


BackTweets - Find Out Who Shares Your Links On Twitter

backtweets

Those of you that use Twitter frequently and also have a blog might be interested in seeing who shares their blog posts on Twitter and for this there is BackTweets, a tool which allows you to search for tweets that contain links to your posts.

All you have to do is enter the URL you want to analyze and the system will show all tweets containing links to your blog. BackTweets can also generate alerts so that you can be notified by email when someone shares your blog posts on Twitter. The alerts frequency can be customized so you can set it to send you daily updates with the buzz generated by your blog posts in the last 24h.

[via puntogeek]

Drag-and-Drop Firefox Mouse Gestures [QuickDrag Addon]

QuickDrag is a Firefox addon which extends the function of the drag-and-drop mouse gesture so that it can be used to load URLs, do a web search of selected text on a page, or save an image on a page.

Here is what QuickDrag looks like in action, as well as more details on how you can use this great extension for Firefox to speed up your browsing.


Some QuickDrag tips and tricks:

-If you hold down [Ctrl] while drag-n-dropping an image, you can open the image in a new tab instead of saving it (if the save images option is enabled).

-If you hold down [Shift] while drag-n-dropping, it will reverse reverse the foreground/background tab behavior for that drag (e.g., if your settings are to open in a background tab, holding [Shift] will open it in a foreground tab instead)

-If you hold down [Alt] while dropping a URL, you will save the URL instead of opening it in a new tab.

Now, some might look at this add-on and say that is not much, however after you start using it, you really start to realize how much more functionality this adds – just be adding a few tweaks to the browser. For more help, you might also check out the author’s FAQ.

SourceForge Community Choice Awards 2009 Winners

The winners of the fourth annual SourceForge Community Choice Awards were announced at this years OSCON. Over 47,000 open source projects were nominated for this years Community Choice Awards and 85 finalists were selected across twelve categories.

This years winner for the Best Project for Government was OpenOffice.org for its popular fully-featured office suite and Firebird, a relational database management system (RDBMS), won the prize for Best Project for the Enterprise. The Notepad++ source code editor won the Best Tool or Utility for Developers and phpMyAdmin, a MySQL administration tool, was chosen as the Best Tool or Utility for SysAdmins.

The social brainstorming and mind mapping application XMind was selected as the Best Project for Academia and ScummVM (Script creation utility for maniac mansion Virtual Machine) was voted as the Best Project for Gamers. The Best New Project went to eeebuntu, a customised variant of Ubuntu for ASUS Eee PC netbooks and this years Best Project for Multimedia was the popular open source audio editor and recorder Audacity.

This years most popular project, winning four out of the twelve categories, was PortableApps.com, which allows users easily install various popular open source applications to a USB flash drive or external hard drive. Once installed, the applications can run completely from the drive and be used on any Windows computer. PortableApps.com, founded by John T. Haller, was selected as this years Best Commercial Open Source Project, Best Visual Design, Most Likely to Change the Way You Do Everything and Best Project.

SourceForge.net is the largest online open source hosting site and hosts over 230,000 projects.

Terminate Running Applications with SuperF4 [Windows Only]

superf4

SuperF4 is a small Windows utility which kills any running application by hitting Ctrl + Alt + F4. It won't notify you or let you save your work but just kill the application in foreground. You can achieve the same thing by using the Windows task manager, then locating the faulty process and then terminating it but SuperF4 is a much faster way to do this.

You can also kill an application by pressing Windows key + F4 and then using you mouse to click on the application you want to terminate.

While you may not have an immediate use for it when you first use it, you will really appreciate that its there when/if you encounter an obstinate program that previously would have required a reboot.

[via downloadsquad]