Ubuntu / Linux news and application reviews.

Enable TRIM On SSD (Solid-State Drives) In Ubuntu For Better Performance

kingston ssd 120gb v200


TRIM allows the OS to "inform a solid-state drive (SSD) which blocks of data are no longer considered in use and can be wiped internally". Without using TRIM, the SSD speed decreases after a while so if you have a solid-state drive that supports TRIM, you should enable it so your SSD remains fast over time.

This isn't easy to benchmark because the performance decreases over time so you'd neet to check the SSD speed constantly for a few months to see exactly how the SSD is affected when TRIM is not enabled. But if your SSD read / write speed decreases a lot over time and you haven't enabled TRIM, this may be way.

Some articles mention using online discard - enabling TRIM by adding the "discard" option to /etc/fstab -, but there are many who say this isn't a good idea for most solid-state drives and you'll get a pretty significant performance hit when trying to delete a large number of small files. So below I'll let you know how to use both of these methods: online discard (not recommended) and the recommended way: using fstrim and a cron (anacron) job.

Note: the instructions below have been tested in Ubuntu, but they may (most probably) work with other Linux distributions as well.

Install Defrag (Defragmentation Application) In Ubuntu

On most forums, websites and so on, when someone asks "do I need to defragment my Linux filesystems?", the answer is "no". But that's a common misconception and in some cases you do have to defragment your Linux filesystems. This is even confirmed by an Ubuntu developer on a very recent post I stumbled upon just a few minutes ago about ureadahead on the ubuntuforums.

I'm not sure if this common misconception is related or not, but there aren't many applications for defragmenting your Linux filesystems. In fact I could only find 2 and posted about them a while back (shake and defrag). Unfortunately defrag development stopped some time ago, but Phillip Susi rescued Defrag by creating a bzr branch in Launchpad and converting Defrag to a native Ubuntu package which you can access @ https://code.launchpad.net/~e2defrag/e2defrag/trunk

To help in saving Defrag, I've uploaded it to the WebUpd8 PPA (packages available for Karmic and Lucid).

Install Gnome Disk Utility (Palimpsest) 2.29.0 In Ubuntu Karmic

Hard Disk Sentinel (Linux Edition) Examines the Health and Temperature of Your Hard Disks

Hard Disk Sentinel - Linux console edition is a tool for examining the health, temperature and other useful info about your disks (IDE, S-ATA, SATA II, SCSI and USB).

Hard Disk Sentinel (Linux Edition)

List of features

  • display hard disk / solid state disk information on the terminal
  • create comprehensive report about the disk system, including both hard disk and SSD specific features (for example, media rotation rate, TRIM command, etc.)
  • display and manage acoustic setting of hard disks (on supported USB disks also)
  • offers outputs for both users and scripts/other applications to process

The following information are displayed:

  • detected hard disk number and device name (for example /dev/sda)
  • size, model ID, serial number, revision and interface of all detected hard disks
  • temperature, health and performance values
  • power on time (days, hour, minutes - if supported)
    Note: this is for informational purposes only, the value displayed under Windows (after some minutes of testing) may be more accurate
  • acoustic management settings (if supported and -aam or -setaam option is used

How to use Hard Disk Sentinel

Download Hard Disk Santinel Linux console edition, then extract the archive contents to any folder. Open a terminal to the folder where you extracted it or navigate using the terminal and run the following command to make the HDSentinel executable:
chmod 755 HDSentinel
Now you can launch it (it needs sudo!) with the following command:
sudo ./HDSentinel [options]
where [options] can be:
  • -h - displays help and usage information
  • -r [report file] - automatically save report to filename (default: report.txt)
  • -dump - dump report to stdout (can be used with -xml to dump XML output instead of text)
  • -xml - create and save XML report instead of TXT
  • -solid - solid output (drive, tempC, health%, power on hours, model, S/N, size)
  • -verbose - detailed detection information and save temporary files (only for debug purposes)
  • -aam - display acoustic management settings (current and recommended level)
  • -setaam drive_num|ALL level(hex)80-FE|QUIET|LOUD - set acoustic level on drive 0..n (or all)
    80 or QUIET is the lowest (most silent) setting, FE or LOUD is the highest (fastest) setting
    For example: hdsentinel -setaam 0 loud - Configures drive 0 to fastest (loud) setting. Same as hdsentinel -setaam 0 FE

Usage examples:

Optimize complete system for silence:

hdsentinel -setaam all quiet

Optimize complete system for high performance (but louder disk access):

hdsentinel -setaam all loud
Select a balanced level between silence and performance on drive 0:
hdsentinel -setaam 0 C0

Eye-Candy Disk Space Usage Analyzer

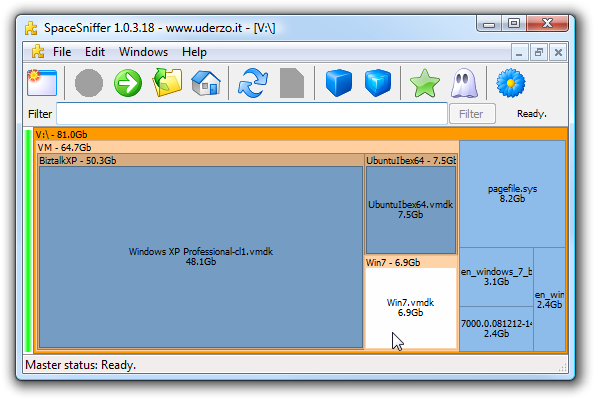
SpaceSniffer is a free program which can analyze your hard disk and present you with a dynamic disk map which tells you which folders and files are taking too much space. It gives you a general idea about the disk usage and you can spot your files and folders which are taking too much space. If you have a large disk, then it makes it easy for you to spot your folders that may be containing too much junk data.

photobucket

The program requires no installation. On running the exe file, the program will ask you to select a disk partition that you want to analyze. Select the drive and it will scan the drive present a Disk Map to you in real time. If you want, you can even open the files and folder or even delete files/folder from there itself and the Disk map will be automatically updated to reflect the changes. Files that are shown can also be filtered and you can customize the chart colours according to your taste. You can also configure it to show free space and unknown space.

The program is a freeware and very small in size. The interface is pretty good with some fancy animations. It works on Windows 2000/XP/2003/Vista.

Detect The Largest Files on Your Hard-Drive with Primitive File Size Chart

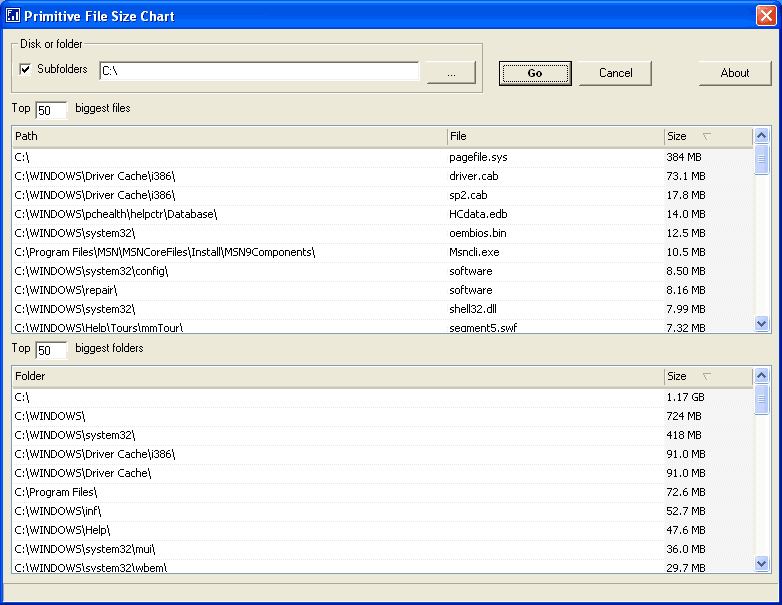
Primitive File Size Chart screenshotIf you're looking to quickly get a snapshot of which folders and files are eating up your disk space, Primitive File Size Chart can help.

Primitive File Size Chart is a simple tool that will analyze the specified disk or folder and show you the 50 largest files and 50 largest folders. The result of this analysis will give you an idea about what occupies a lot of space on your disk. For example, it may be useful in case you need to free a lot of disk space. There can be huge files you had no idea about or forgot to delete. Besides regular users, Primitive File Size Chart will be useful for professionals engaged in processing large arrays of video and audio files and also for system administrators. The program is absolutely free and does not require installation.

Results were returned within seconds even when scanning a packed 1TB disk. Primitive File Size Chart doesn't have any fancy bells or whistles but it will give you the path, file name, and size of your largest files making short work out of assessing what is filling up your disks. Primitive File Size Chart is freeware, Windows only.

[via lifehacker.com]