Ever needed to post some code intro a blog post and you wanted it highlighted, in a box of a different color than the background color of your post? Or, you posted a really long code (javascript / css, etc) in a post and wanted scrollbars on it? Here is how to to it in Blogger (the Greasemonkey script is for blogspot.com, the CSS code works on any blogging platform):
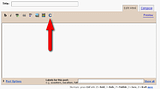
First, go to your blogger Dashboard, Layout > Edit HTML and search for: ]]></b:skin> and paste this above it:
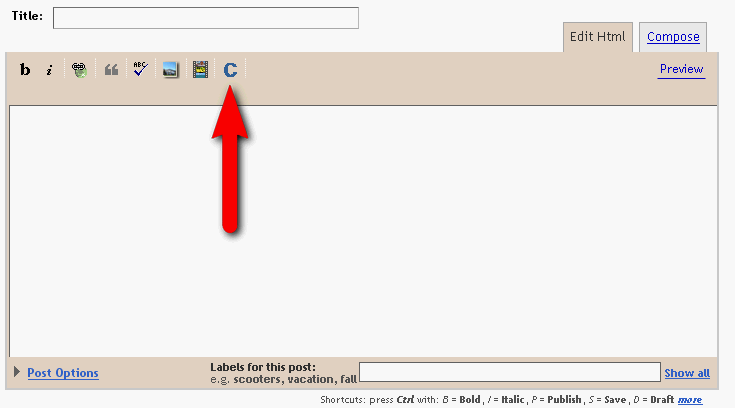
That's the default code that comes with this great Greasemonkey script: Blogger Source Code Formatter. After you have inserted the above code intro your layout and then installed the Greasemonkey script, a new button will be available when posting in "Edit HTML" mode on Blogger, "C":
Select some text and press it, then publish the article and see how it looks like. When you click the button, the selected text is warped around with the following code:

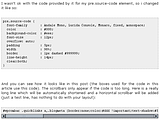
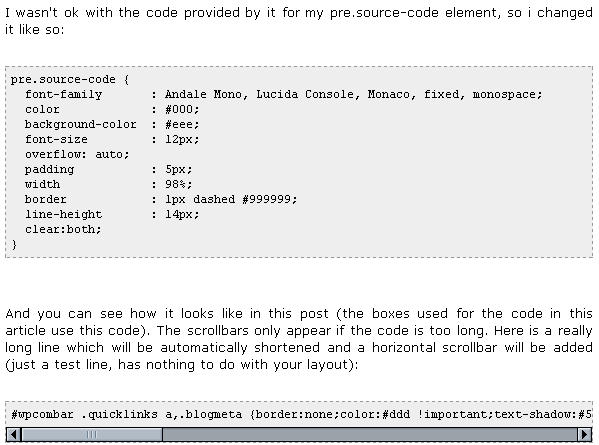
I wasn't ok with the code provided by it for my pre.source-code element, so i changed it like so:
This is how it will look, using the code above:
The scrollbars only appear if the code is too long. Here is a really long line which will be automatically shortened and a horizontal scrollbar will be added (just a test line, has nothing to do with your layout):
Update: but there is a much more cool way to do this, just add this code instead of the one above:
That will make the code boxes look exactly like on our blog (you can see it all over this post). You can of course (please do! :) ) change the images to your blog's width and colors / font.
This is a modified version of Professional Code Box For Bloggers via tutzone.org
First, go to your blogger Dashboard, Layout > Edit HTML and search for: ]]></b:skin> and paste this above it:
pre.source-code {
 font-family       : Andale Mono, Lucida Console, Monaco, fixed, monospace;
 color             : #000;
 background-color  : #eee;
 font-size         : 12px;
 border            : 1px dashed #999999;
 line-height       : 14px;
 padding           : 5px;
 overflow          : auto;
 width             : 100%;
 text-indent       : 0px;
}
That's the default code that comes with this great Greasemonkey script: Blogger Source Code Formatter. After you have inserted the above code intro your layout and then installed the Greasemonkey script, a new button will be available when posting in "Edit HTML" mode on Blogger, "C":
Select some text and press it, then publish the article and see how it looks like. When you click the button, the selected text is warped around with the following code:
I wasn't ok with the code provided by it for my pre.source-code element, so i changed it like so:
pre.source-code {
  font-family       : Andale Mono, Lucida Console, Monaco, fixed, monospace;
  color             : #000;
  background-color  : #eee;
  font-size         : 12px;
  overflow: auto;
  padding           : 5px;
  width             : 98%;
  border            : 1px dashed #999999;
  line-height       : 14px;
  clear:both;
}
This is how it will look, using the code above:
The scrollbars only appear if the code is too long. Here is a really long line which will be automatically shortened and a horizontal scrollbar will be added (just a test line, has nothing to do with your layout):
#wpcombar .quicklinks a,.blogmeta {border:none;color:#ddd !important;text-shadow:#555 0px -1px 0px;display:block;font:13px "Helvetica Neue", Arial, Helvetica, sans-serif;font-weight:normal;letter-spacing:normal;padding:0 0.75em;line-height:28px;text-decoration:none !important;}Update: but there is a much more cool way to do this, just add this code instead of the one above:
pre.source-code {background:#f5f8fa; background-image:url(http://i142.photobucket.com/albums/r99/nilarimogard/30bmq7a.gif); background-repeat:no-repeat; border: solid #5C7B90; border-width: 1px 1px 1px 20px; color: #000000; font: 13px 'Courier New', Courier, monospace; line-height: 16px; margin: 10px 0 10px 10px; max-height: 500px; min-height: 16px; overflow: auto; padding: 28px 10px 10px; width: 90%;}
pre.source-code:hover {background: #FAFAFA; background-image:url(http://i142.photobucket.com/albums/r99/nilarimogard/o7t4j9.gif); background-repeat:no-repeat;}
That will make the code boxes look exactly like on our blog (you can see it all over this post). You can of course (please do! :) ) change the images to your blog's width and colors / font.
This is a modified version of Professional Code Box For Bloggers via tutzone.org
